http://
Last modified .
This document is meant for both ordinary users of PicSearch program
and researchers who are interested in developing the program suitable for
their purposes. This document should be simple enough for anybody, but
some knowledge of image processing, graphical user interfaces and databases
are sure to make the learning quicker.
Check the 6. Glossary for terms used throughout
this document.
This document covers the version 1.0 of PicSearch. This version is designed
to work in environments such that Linux, UNIX and MS Windows 95. This document
is meant especially for the UNIX system environment.
PicSearch is a tool for searching images from database based on a query image chosen by the user. The idea is that the user can draw a sketch or load a complete image from a file or manipulate an existing image to be used in a query. The query tries to find the images from the database which are as close as possible to the query image. The definition of close is depends on the algorithm used for the query.
User may choose the desired algorithm from a list. Researchers may also implement new algorithms by coding them directly into the system (using a ready template and filling in the necessary function implementations).
The program is designed to be as independent as possible of the environment. The environment means here both the operating system and the window manager. Within PicSearch system there are two main interfaces: graphical user interface and the database interface.
PicSearch-system consists of
In addition you'll need some external components
No special hardware is required. Screen resolution must be 800*600 or more for the main window to fit to the screen, for convenient usage use 1024*768 or 1280*1024.
The installation instruction can be found in Developer's Manual. If using Windows95 or NT, you do not need to compile the system. Using Explorer, just click file 'run.bat' in the main directory of PicSearch.
Before start-up you need to set the environment variable "PICSEARCHDIR" to point to the root of the application's directory structure.
In Unix (using tcsh-shell): setenv PICSEARCHDIR <dirname>
In Windows: set PICSEARCHDIR <dirname>
The program is launched just by writing "picsearch" in the root directory of the application. The usage of the graphical user interface is mostly self-explanatory.
There are two possible command-line options for PicSearch:

In the menubar under label 'Options' is a label 'Set options'. By clicking it you can open a window for general options, in which you can set several system-wide options. The options are saved to database, so they will be in effect also the next time you'll start the application. The options available are:
If you enter invalid values to width/height field, the program will change them to acceptable ones.

In the menubar under the label 'Options' is a label 'Window size'. The main window of PicSearch is not freely resizeable, but you can select one of the three pre-defined sizes (800x600/1024x768/1280x1024) by dragging the mouse over the label and then selecting the wanted size.
In the lower left part of the PicSearch main window is a textbox labeled 'Infoscreen'. Its function is to inform the user what is happening in the program and to warn about invalid operations/parameters etc. If you turn on some of the debug messages (see 3.1.1 Setting general options) you will receive additional information about the state of program.
The text on the Infoscreen can be scrolled up and down using to scrollbar on the right side of the textbox.
In the menubar under label 'File' is a label 'Quit'. By clicking it you can exit PicSearch. If is a batch insertion and/or database update in progress while you are trying to exit, the program will display a dialog window in which you are asked whether you want to exit anyway. If you select 'Yes', the program will stop the ongoing procedure(s) and exit. By selecting 'No' the program will continue to run normally.
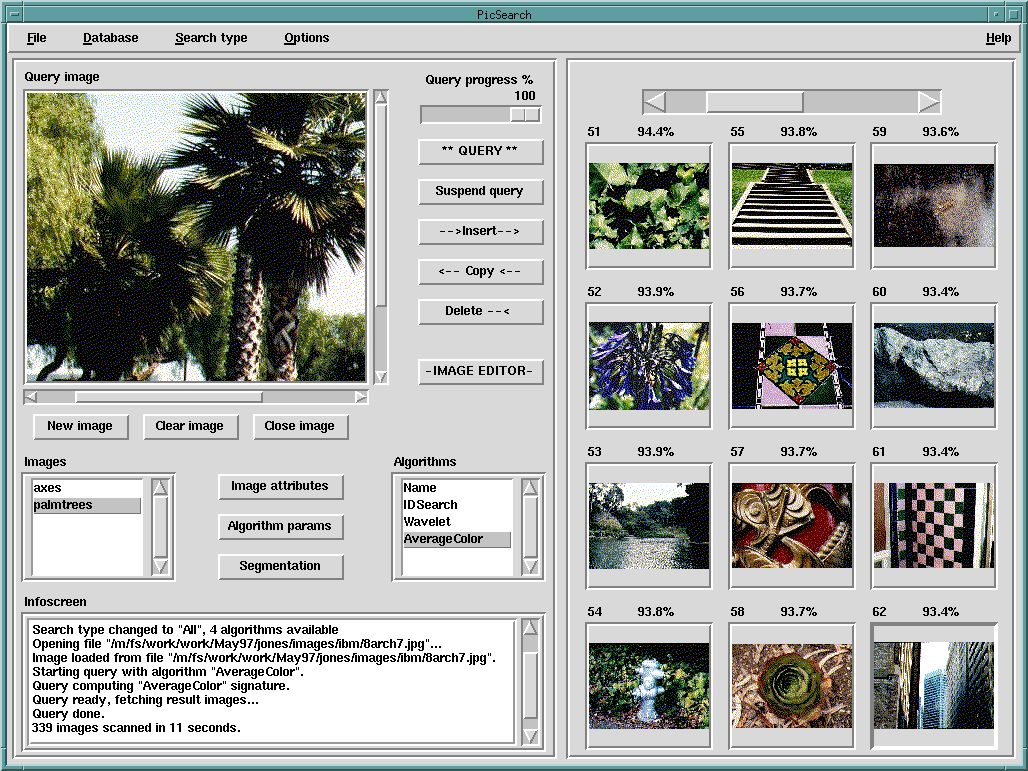
On the left side of the main window between query image canvas and infoscreen is a listbox labeled 'Images'. In this listbox you can see the names of all the query images. By clicking one of these names you can select the active image. The active name will appear with a gray background. The current active query image will be shown in the query image canvas above the listbox. If the image is bigger than the canvas you will be able to scroll it using the two scrollbars.
Under the query image canvas is a button labeled 'New image'. By clicking this button you can create new query images. When the button is clicked, a new name will appear as active one in images listbox and the query image canvas will become empty. The name of the new query image will be 'example<n>' where <n> is some number. The name and the other parameters can naturally be modified (see 3.2.5 Changing the attributes of current query image). The default width and height of a new query image are defined in general options (see 3.1.1 Setting general options).
Under the query image canvas is a button labeled 'Clear image'. When the button is clicked, all the attributes of the active query image will change to the default ones and the image itself is cleared.
Under the query image canvas is a button labeled 'Close image'. When the button is clicked, the current active query image will be removed off the screen. When there is only one query image left, the image is not deleted but the action will be similar to 'Clear image'.
In the left side of the main window between the 'Images' and 'Algorithms' listboxes is a button labeled 'Image attributes'. By clicking it you may open a window, in which you can view and change the attributes of the current query image. Some of the attributes cannot to changed (image id and filename). Attributes, that can be changed are
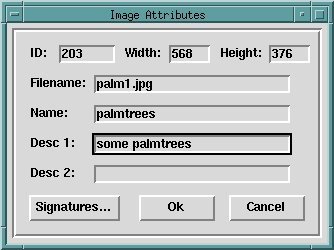
If you change the size of the image, the image will not 'scale' but some of it will be cut away or the image will expand with blank area. If you enter an invalid value to a field, the program will change it to acceptable one. In addition to normal 'Ok' and 'Cancel' buttons there is a button labeled 'Signatures'. By clicking it you may open a window in which you can see the signature of the current query image computed with the selected algorithm. You can also see the signatures calculated with other algorithms by choosing another algorithm in the 'Algorithms' listbox. Signatures are available only for query images which are copied from database.
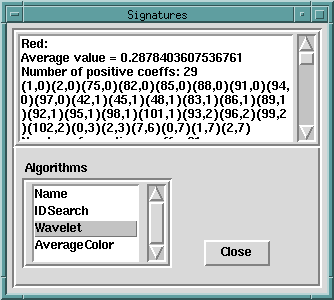
In the menubar under label 'File' is a label 'Open image'. By clicking it you may open a window for file loading. The entry on the top-left of window will show the current directory. The entry on the bottom-left will show the selected filename. You can select a filename or move in the directory tree by double-clicking the names shown in file selector box. On the right side of the window is a group of labeled radiobuttons. They are filename filters to make the file selection procedure easier. For example, if you choose the radiobutton labeled 'ppm images (*.ppm)', only the filenames ending with '.ppm' will be shown in the file selector box. At this moment the supported file formats for loading images are PPM, JPEG and SUNRASTER (*.ras, not shown in the image below).
NOTE: The system is able to identify a proper image file even if the file extension is 'wrong'.
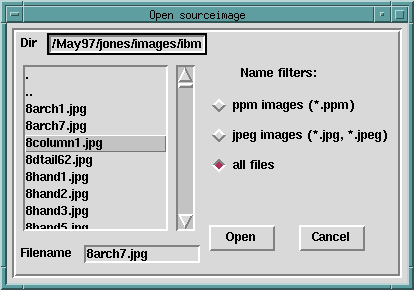
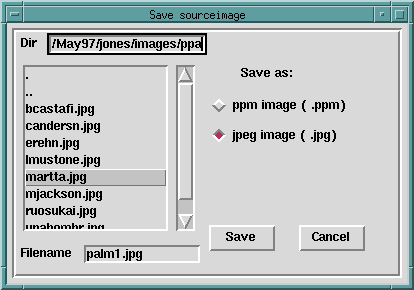
In the menubar under label 'File' is a label 'Save image'. By clicking it you may open a window for file saving. The entry on the top-left of window will show the current directory. The entry on the bottom-left will show the filename of the image to be saved. You can select a filename or move in the directory tree by double-clicking the names shown in file selector box. If you select a filename that already exists and click 'Save' button, the program will open a dialog window in which you will have to confirm whether you want to overwrite an existing file. The file format used is determined by the name you give to the file. If you do not supply any extension (of those the program identifies) the program automatically appends one. On the right side of the window is a group of labeled radiobuttons. By using them you can choose the appended extension (an thereby the file format) for the image to be saved. At this moment the supported file formats for saving images are PPM, JPEG and SUNRASTER (not shown in the image below).
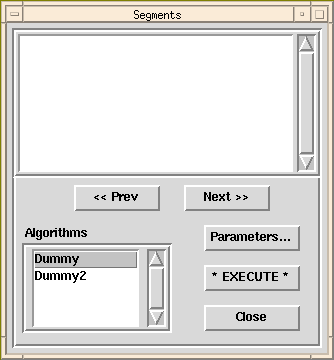
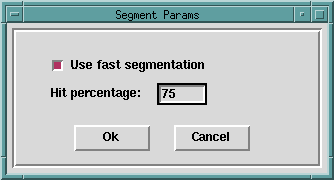
On the left side of the main window between the 'Images' and 'Algorithms' listboxes is a button labeled 'Segmentation'. By clicking it you may open a window, in which you can segment the current query image with various segmentation algorithms, which are shown in the listbox labeled 'Algorithms'. You can choose the active algorithm by clicking it's name. The active name will appear with a gray background. Current algorithm's parameters can be changed by clicking the button 'Parameters', which opens a new window. The parameters are algorithm-dependent. The segmentation process is started by clicking '* EXECUTE *' button. The produced segments can be browsed by clicking '<< Prev' and 'Next >>' buttons.
In the menubar under label 'Search type' is a list of available search types. For each search type there will be one or more search algorithms. You can choose the active search type by dragging the mouse. The active search type's radiobutton is shown highlighted. The listbox showing the names of the available search algorithms is updated immediately.
On the left side of the main window between the query image canvas and the infoscreen is a listbox labeled 'Algorithms'. In this listbox you can see the names of all the algorithms available in the current search type. By clicking one of these names you can select the active algorithm. The active name will appear with a gray background.
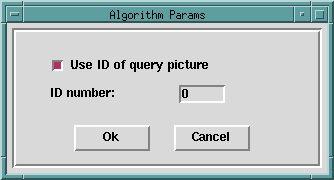
In the left side of the main window between the 'Images' and 'Algorithms' listboxes is a button labeled 'Algorithm params'. By clicking it you may open a window, in which you can see and change the parameters of the current search algorithm. The parameters are algorithm-dependent.
Right to the query image canvas is a button labeled '** QUERY **'. By clicking it you may start a new query with the active query image and search algorithm. You can see the progress of the running query from the percentage scale above the button. If there was a query running at the moment you pressed the button, the old query will be stopped at once. Depending whether you have selected the 'Show results of an interrupted query' option in general options (see 3.1.1 Setting general options) you may see the partial query results on the right side of main window.
Right to the query image canvas is a button labeled 'Suspend query'. By clicking it you can suspend a query in progress. You can continue the suspended query by clicking the same button again (it's label has changed to 'Continue query'). You can see the progress of the query from the percentage scale above the '** QUERY **' button.
On the right side of the main window is a group of frames and above them a big scrollbar. The results of a query will be shown in these frames and above each frame there will be an index (the ranking of the corresponding image in the query) and a match rate (i.e. how well did the image match the query image). You may browse the results by dragging the scrollbar. If you click one of the limiting arrows of the scrollbar, the results will shift 'one screen' to the clicked direction. If you click the 'empty space' between actual scrollbar and the limiting arrow, the results will shift to the end/beginning.
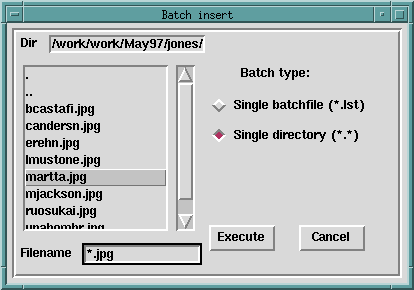
In the menubar under label 'Database' is a label 'Batch insert'. By clicking it you may open a mass-insertion window. The entry on the top-left of window will show the current directory. The entry on the bottom-left will show the selected filename. You can select a filename or move in directory tree by double-clicking the names shown in file selector box. On the right side of the window is a group of labeled radiobuttons. Using them you may select whether you want to use a single batch file (a text file consisting of filenames, must be named with the extension '.lst') or just insert some images using a file mask (e.g. *.ppm). If you try to start another mass-insertion while there is already one running, the program will inform you with a dialog window and ask whether you want to stop the running insertion.
Right to the query image canvas is a button labeled '-->Insert-->'. By clicking it you may insert the current active query image to the database. If the query image is already in the database, the program will inform you with a dialog window and ask whether you want to
NOTE: If you are already storing the images in files (for example on a CD-ROM) it's probably a good idea not to copy the image data itself into the database, but rather just to store the filename. To achieve this, check that parameter "Copy images to database physically" is off (see 3.1.1. Setting general options). In any case the program will store a tiny copy of the original image to the database. This is shown in the query results and the original (big) file is retrieved only when specifically requested (see 3.4.4. Copying the active database image to an query image).
You can choose a database image to be "active" by clicking it (see 3.3.6. Browsing query results).
Right to the query image canvas is a button labeled '<--Copy<--'. By clicking it you may copy the active database image into the current active query image (the previous attributes of the active query image will be overwritten). This way you may view the attributes, signatures and segments of a database image and use it as basis for queries.
Right to the query image canvas is a button labeled 'Delete--<'. By clicking it you may delete the active database image from the database. The program will ask you to confirm the action with a dialog window (just to avoid accidents). Note that only the database is affected, not the original image file, if any.
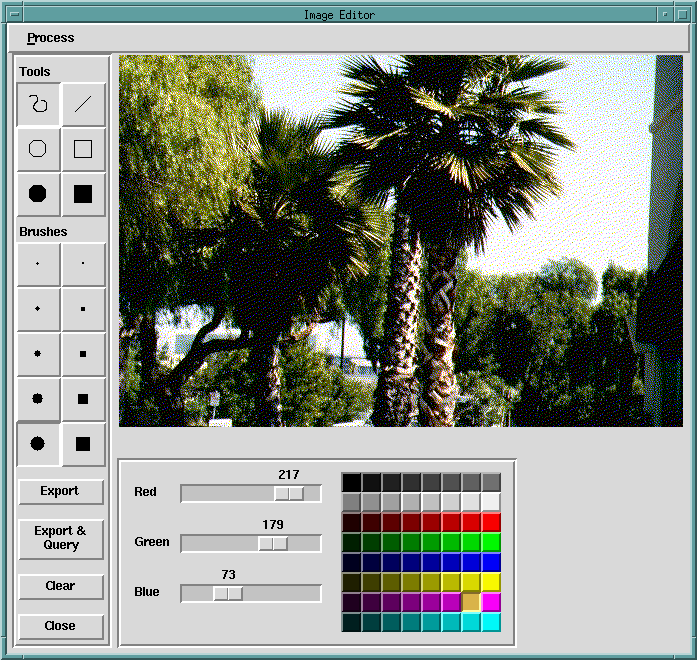
Right to the query image canvas on the main window is a button labeled '-IMAGE EDITOR-'. By clicking it you may open a new image editor window. The current active query image is automatically copied to the editing canvas of the editor. Note, that you can simultaneously have several image editor windows open, one for each query image. Just change the current active query image and click the button. Editing the image on the editor window does not affect the corresponding query image of main window until you "export" the changes you've made (see 3.5.8. Exporting the edited image back to query image).
In the bottom-right of the editor window is a 'palette' (group of pre-defined colors). You can select the active color by clicking it. The active color is shown sunken. The active color's RGB values will be shown with the scale sliders on the left side of palette. You can modify the active color by dragging the sliders. Above each slider is a number that shows the current value of the color component (0...255).
In the middle-left of the editor window is a group of icons under the label 'Brushes'. Each icon represents a brush with a certain size and shape. You can select the active brush by clicking the icon desired. The icon of the active brush will be shown as sunken.
In the top-left of the editor window is a group of icons under the label 'Tools'. Each icon represents a certain drawing object. The objects are
You can select the active tool by clicking the icon desired. The icon of the active tool will be shown as sunken.
In the upper-right of the editor window lies the drawing canvas. The size of the canvas depends on the size of the active query image. There are two slightly different drawing methods. If you have selected 'free hand drawing', drag the mouse while pressing the left mouse button to draw and release the button to stop. With other drawing tools, press the left mouse button at the desired starting point of the drawing object. Then drag your mouse with the left mouse button pressed down to the desired endpoint (the object to be created will follow the mouse with rubberband-effect) and release the mousebutton.
In the bottom-left of the editor window is a button labeled 'Clear'. By clicking it you may clear the image in drawing canvas. Notice, that clearing will not affect the query image until you export the edited image back to query image (see 3.5.8. Exporting the edited image back to query image).
In the menubar of editor window under the label 'Process' is a list of available image processing algorithms. By clicking one of these algorithms you may open an image processing window in which you can set the algorithm-dependent processing options and start the processing operation. If you enter invalid parameters to options and start processing, the program will inform you with a dialog window and ask whether you want to process the image anyway. Note that processing an image may take more than a few seconds.
In the bottom-left of the editor window there are two buttons labeled 'Export' and 'Export & Query'. By clicking the 'Export' button the edited image will be updated to the corresponding query image on the main window. By clicking 'Export & Query' the edited image will be updated, and a new query will start with the updated query image and active search algorithm. Note that exporting an image may take more than a few seconds.
In the bottom-left of the editor window is a button labeled 'Close'. By clicking it you may exit the editor window. Note, that the query image in main window is not automatically updated. So, if you edit the image in editor window without exporting it, the changes will be lost. However, a confirmation dialog window is shown, if you set the system parameter "Use asking dialog in image editor" on. (see 3.1.1. Setting general options)
In the lower left part of the PicSearch main window is a textbox
labeled 'Infoscreen', where you'll see all sorts of messages. When encountering
problems, first check the messages on the Infoscreen.
If not helpful, turn on some of the debug flags from the Options-window
(see 3.1.1. Setting general options). Then try to
reproduce the error situation to find out more about the inner workings
of the program.
The error information provided by the system is usually self-explanatory. However, sometimes the error messages shown may be too general ("Error setting algorithm parameters") or too specific ("File error: 9") or even contradictory. The last case probably indicates a programming error, while the two first cases are signs of too broad or missing error categories. When facing such error messages, please inform us. When programming your own algorithms, remember to follow the uniform error reporting procedures now prevalent in the system. Don't hesitate to add debug-statements (but use the DEBUG-macros, so you won't normally clutter the infoscreen with useless information).
The system produces a log file (named ERROR.LOG) of errors encountered. The errors logged include errors due to mistakes and shortages in the program code as well as many of the "errors" produced by the user (e.g. "File not found"). You may check the log file to find out what exactly happened in some error situation. If the system actually crashed, there may be some explanatory information in the log file that never managed to reach the Infoscreen.
Note that the error information is produced out of the commonly used error messaging interface throughout the program code and errors not foreseen by the programmer are *not* logged.
You will need to set the environment variable PICSEARCHDIR to point
to the directory where you've installed PicSearch. E.g.
In Unix (using tcsh-shell): setenv PICSEARCHDIR <dirname>
In Windows: set PICSEARCHDIR <dirname>
Make sure someone else is not running PicSearch. Currently only one
user at a time can access the database. *If* no one else is running the
system, try to delete the file "DBLOCK.LCK" under the PicSearch
root directory.
If the problem still prevails, the database may have been corrupted. In
that case you'll need to restore it from your backups. If you don't have
any, just delete all files in directory "database" under the
PicSearch root directory.
Check the your user rights for the files.
You have probably inserted files into the database as links (i.e. only the original filenames are saved). Check that the files are still accessible. The query result images are just small copies of the originals so they don't indicate the accessibility of the original image file.
When inserting an image into database, all the signatures of the image have to be computed. When there are numerous search and segmentation algorithms present in the system, this may take a lot of time. You'll probably prefer to add images through mass-insertion (see 3.4.1. Mass-inserting images into database). Of course, if there is a serious bug in any of the algorithm implementations, the system has no way of recovering. Try to reproduce the situation with algorithm debug flag set on.
Some programs (for example, Netscape) manipulate the screen colors (this is system-dependent). Try closing down these programs.
This list contains references for further study of the subject.
Related information:
Related software:
Query image is an image, that is used as a comparison image while doing database queries. Each database image is matched with the query image to give match rate value.
Database image is an image inserted into database. Database images with the best match rates relative to an query image are shown as the result of a query.
Search algorithms are used to calculate the match rates between database images and the query image. Each search algorithm has its own way of measuring how "close" two images are. Each search algorithm has a (hidden) signature algorithm associated with it for computing a signature of an image. When querying, only the signatures are compared, not the actual images.
Signature is a compact presentation of an image data used to summarize the contents of an image. A signature algorithm computes a signature for an image.
Query fetches from the database those images which are as close as possible to the query image. The term close is dependent on the search algorithm.
Segmentation means different kinds of partitionings of an image. A segmentation algorithm computes a segmentation for an image.
Image processing means manipulating an image with some method (other than drawing on it yourself). For example, a negation of an image is a kind of image processing.
Radiobuttons are buttons used to provide a way to select one of several mutually exclusive options. Several radiobuttons work together to control a type of single action.